Phoenix - You're doing it wrong


(Xenithos) #1

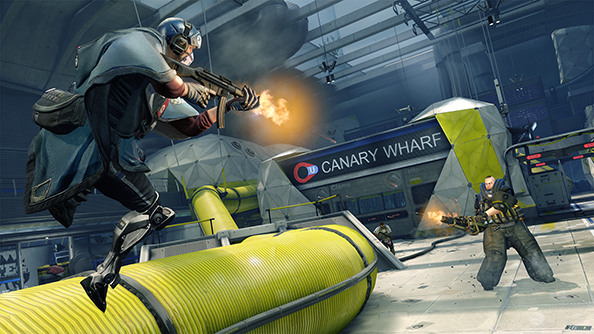
INTRODUCTION - “WHY PHOENIX?”

Character Concept by Johnathan Fletcher - Dirty Bomb Game Artist

Just a heads up, Starting June 2nd 2018 the forums underwent an amazing overhaul that trashed this guide, I hope to have the entirety of it fixed and re-released by June 4th. Thanks for your patience!

Alright mercs, let’s get straight to business:
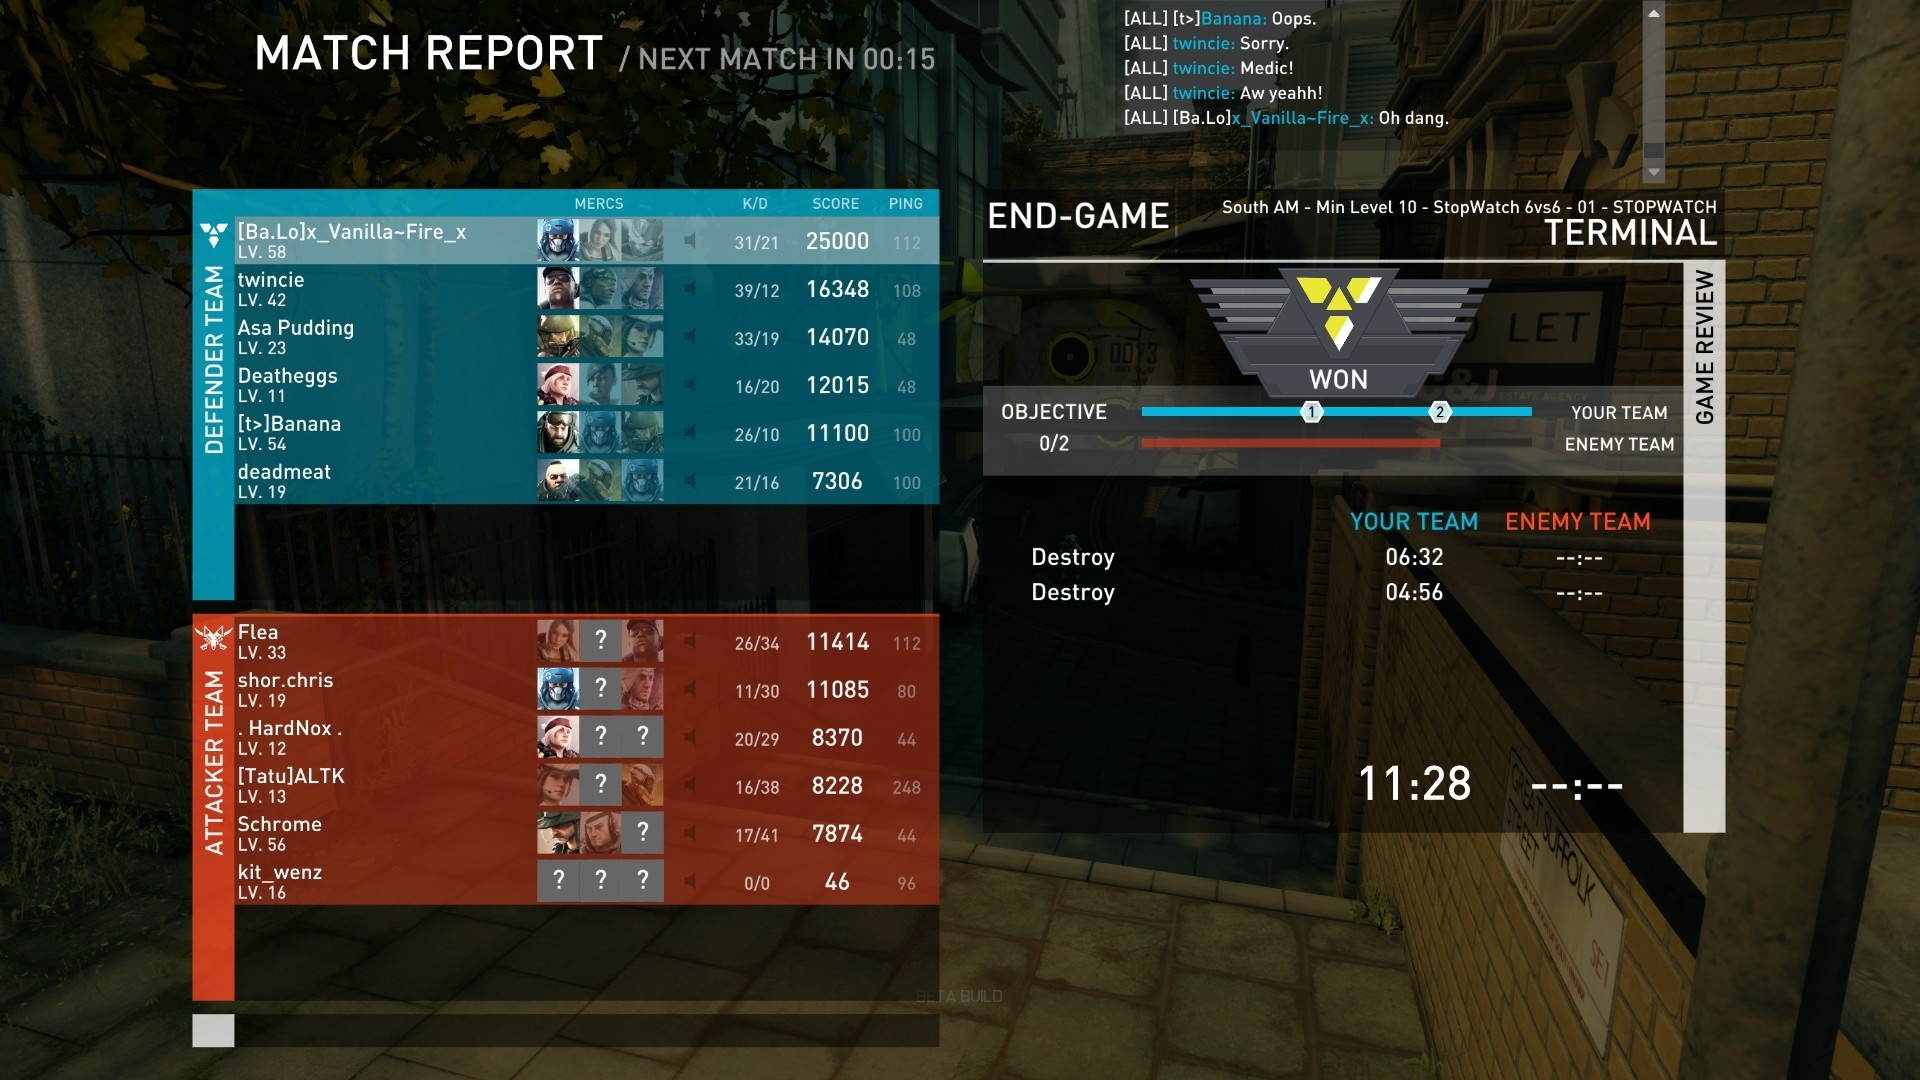
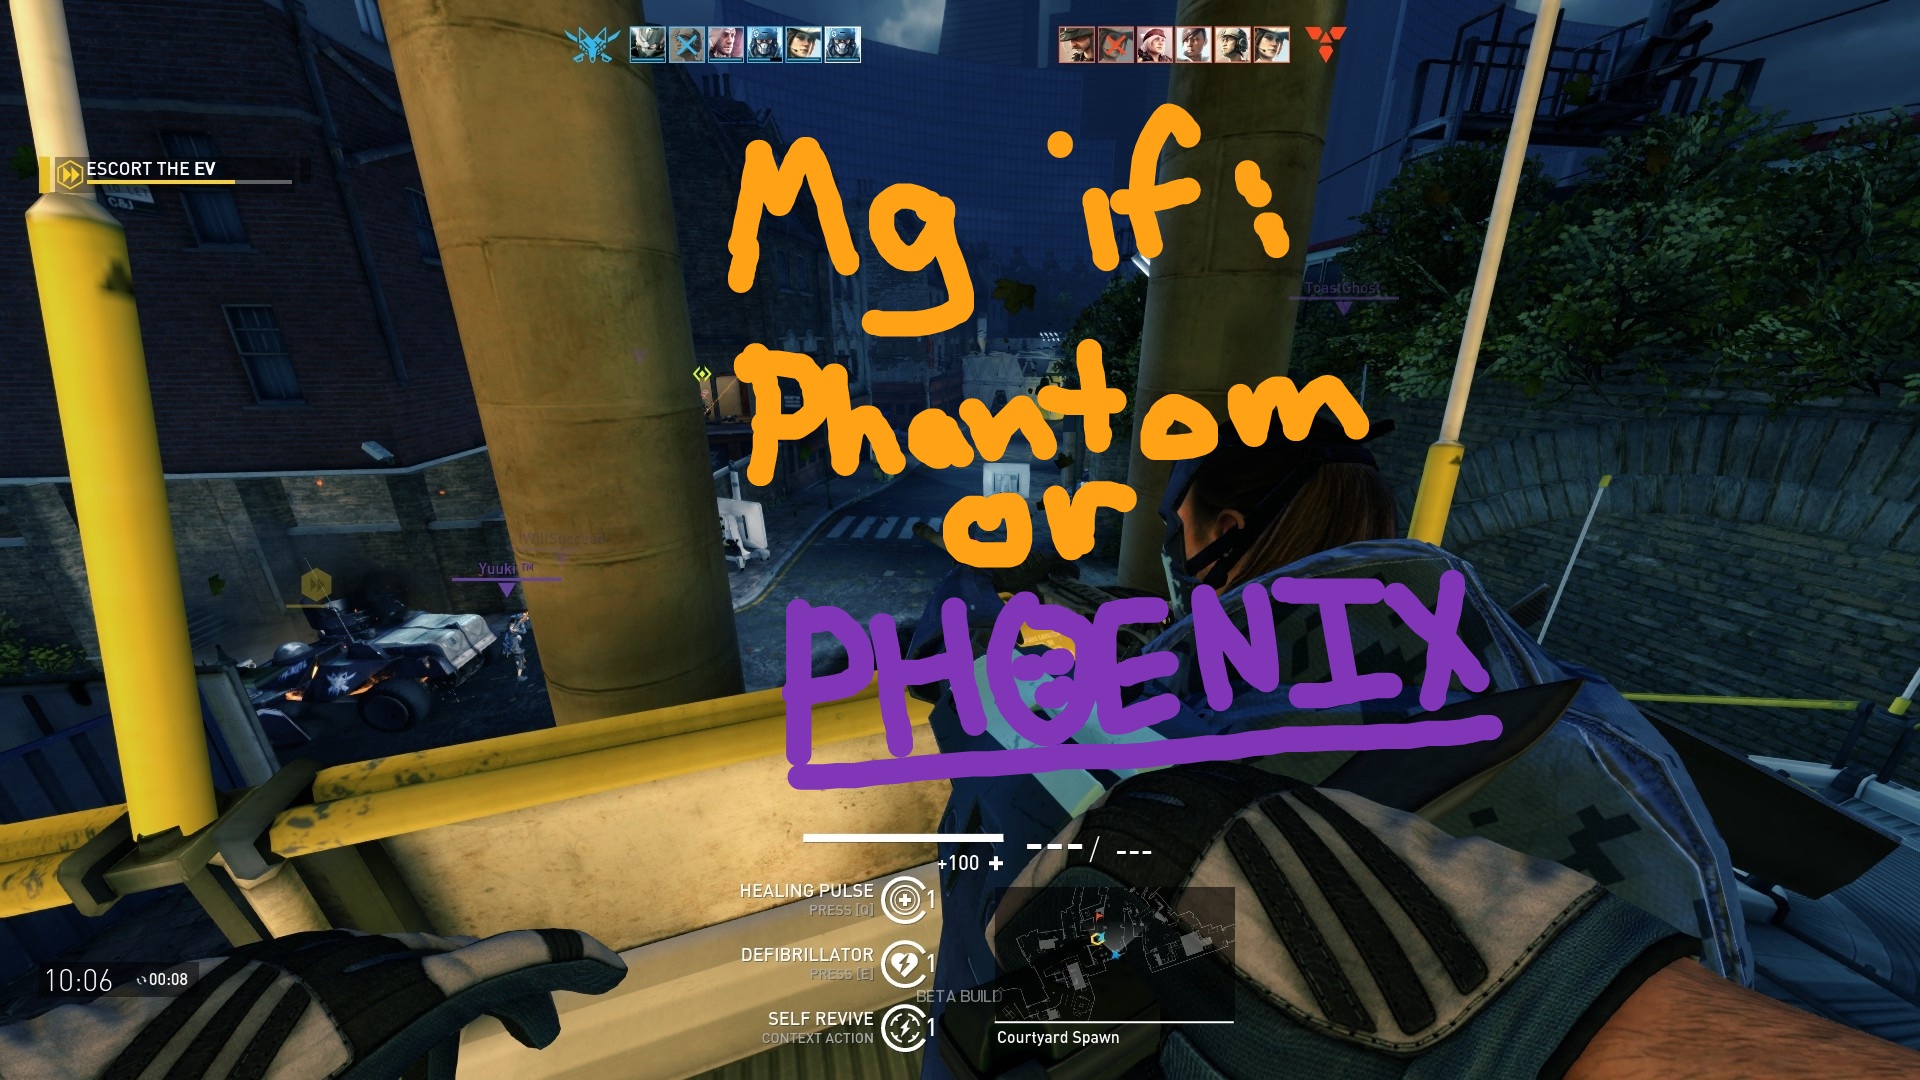
Phoenix is the UNDISPUTED best medic when played correctly in Dirty Bomb.

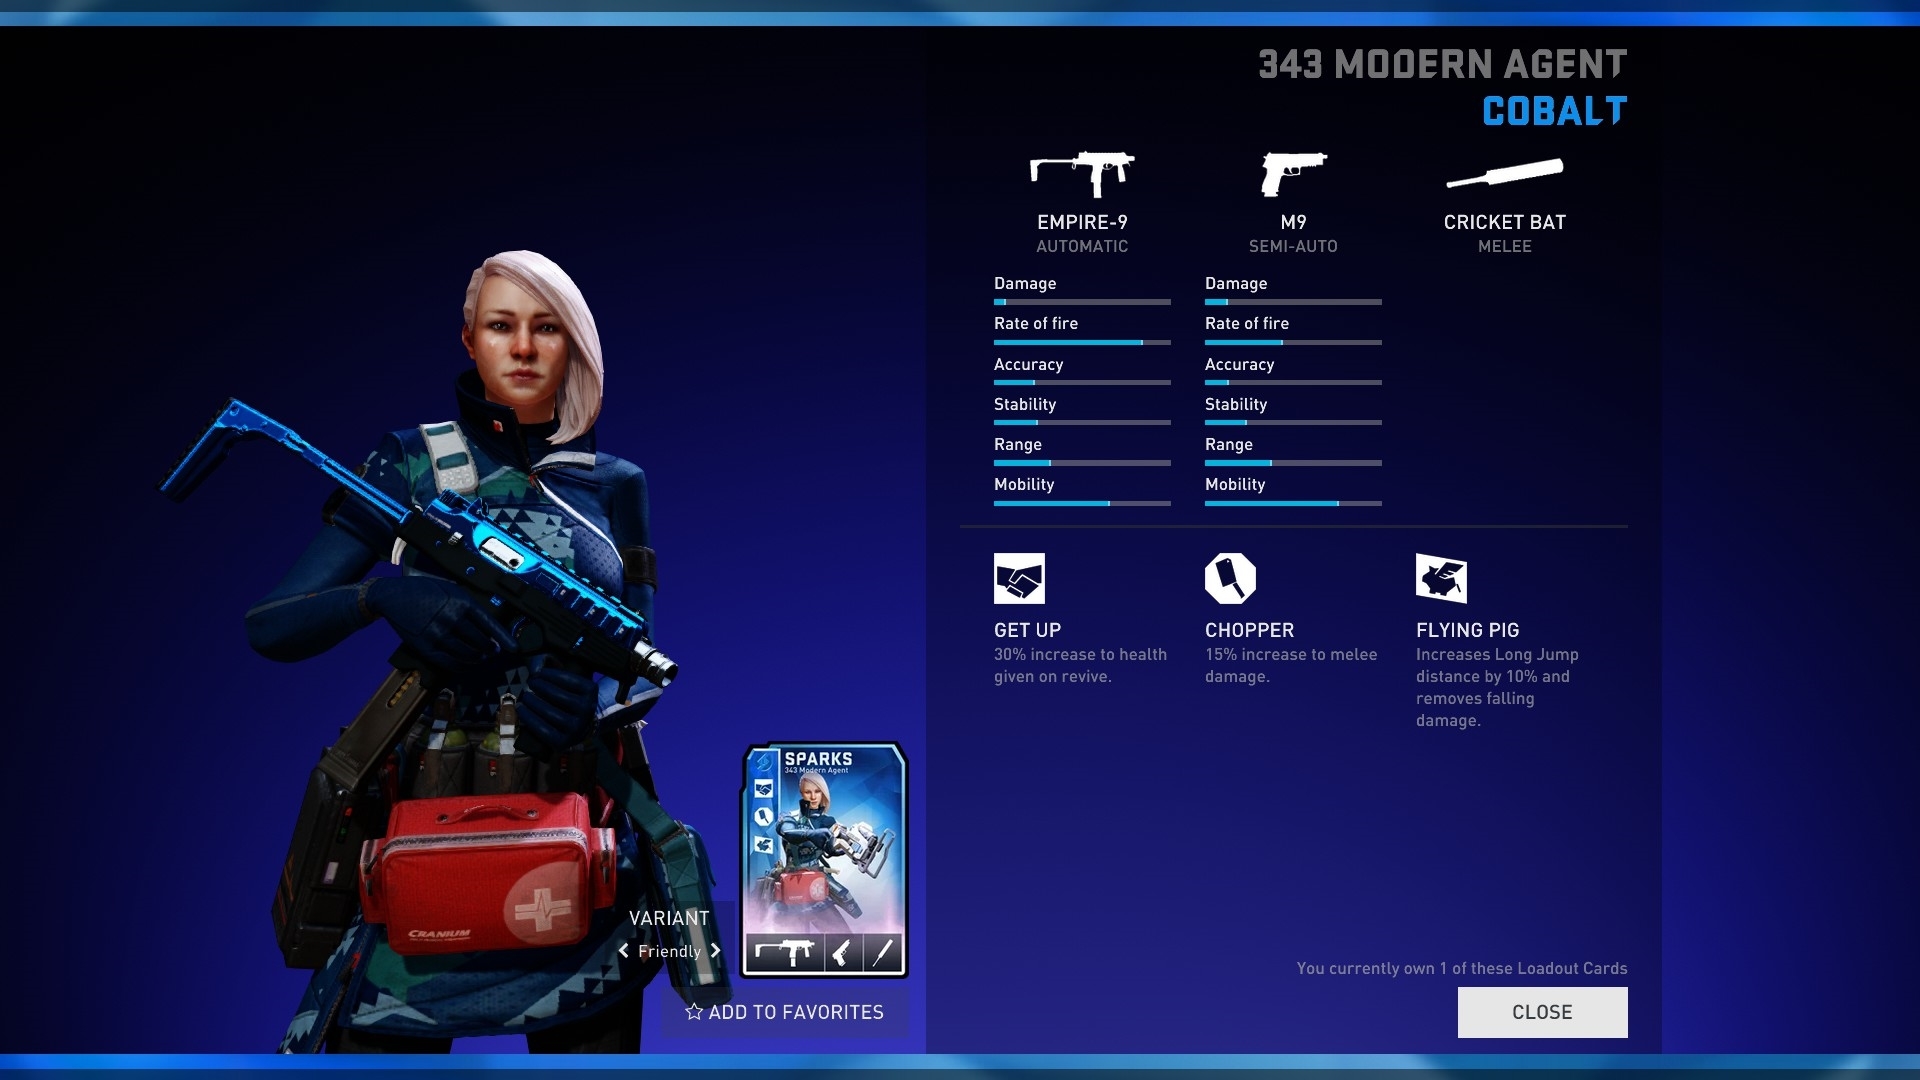
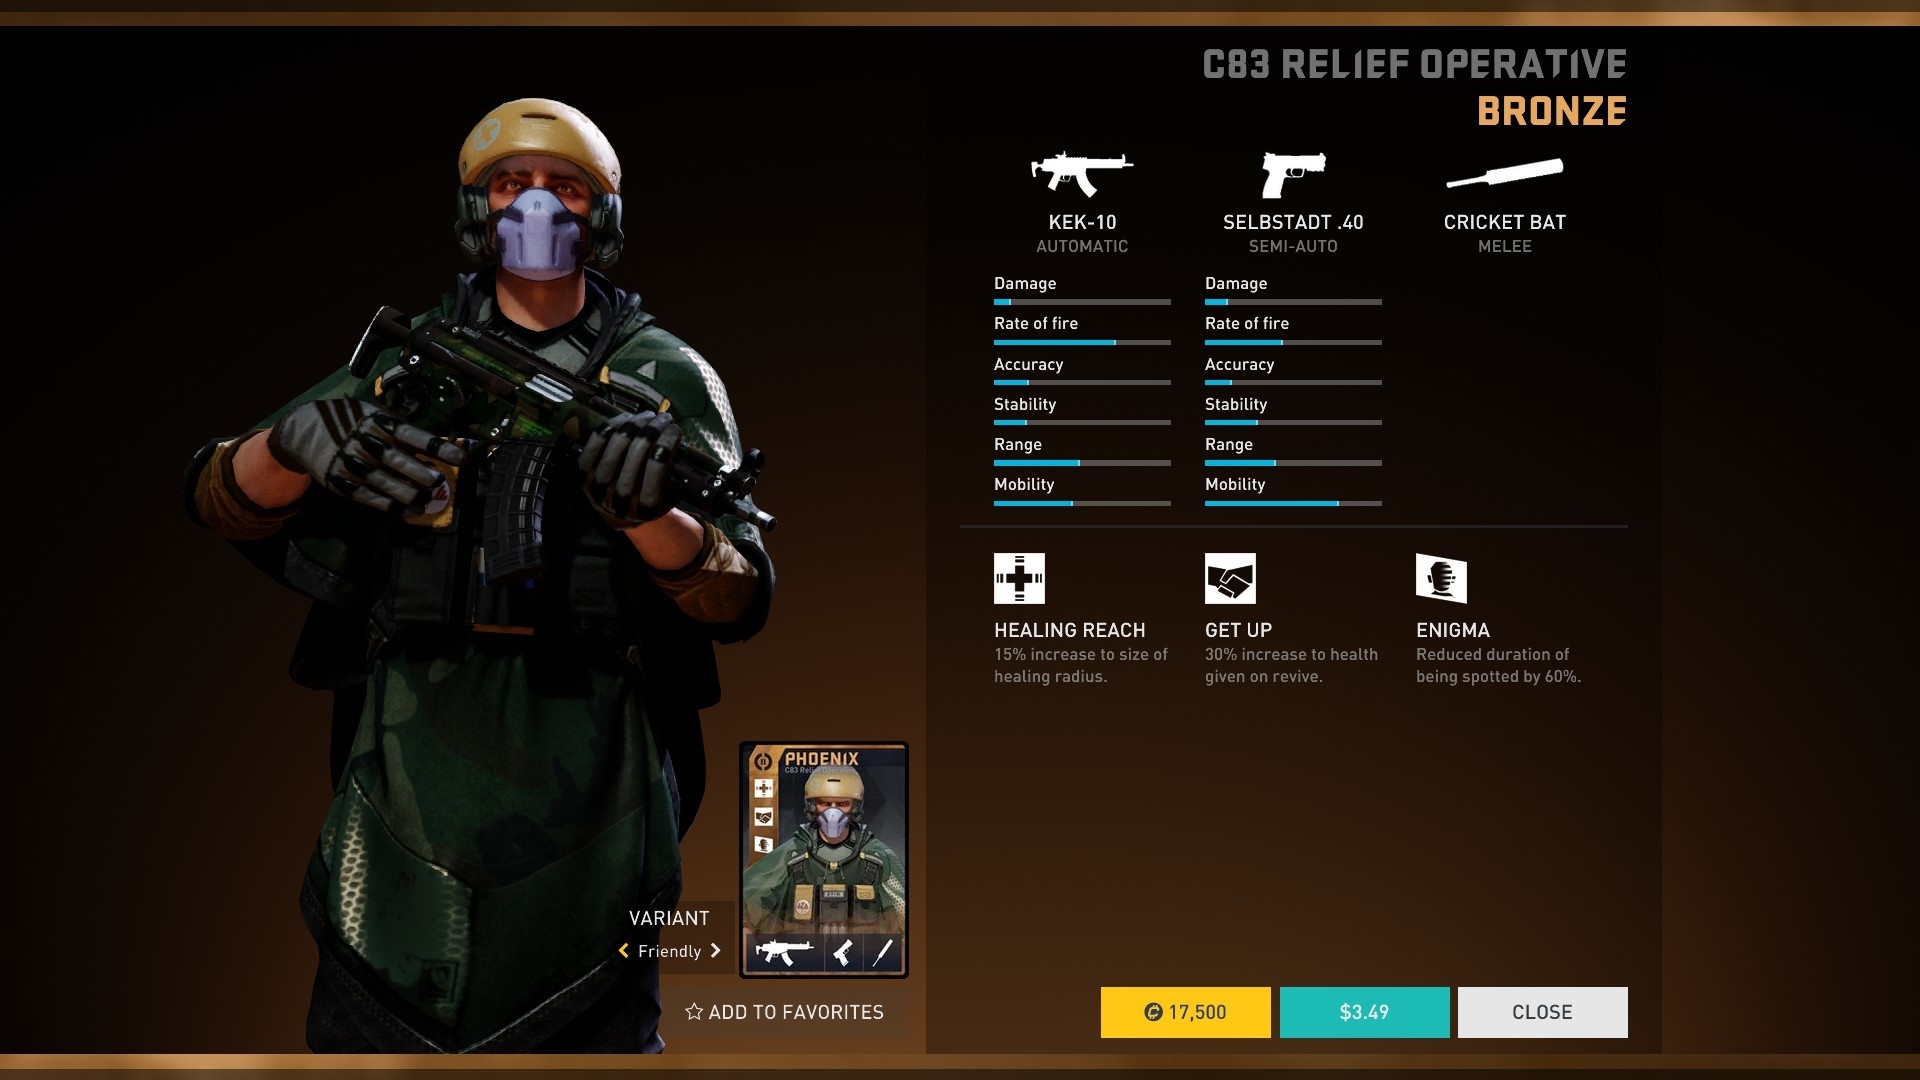
Comparisons to other Medics

But what makes him the best?

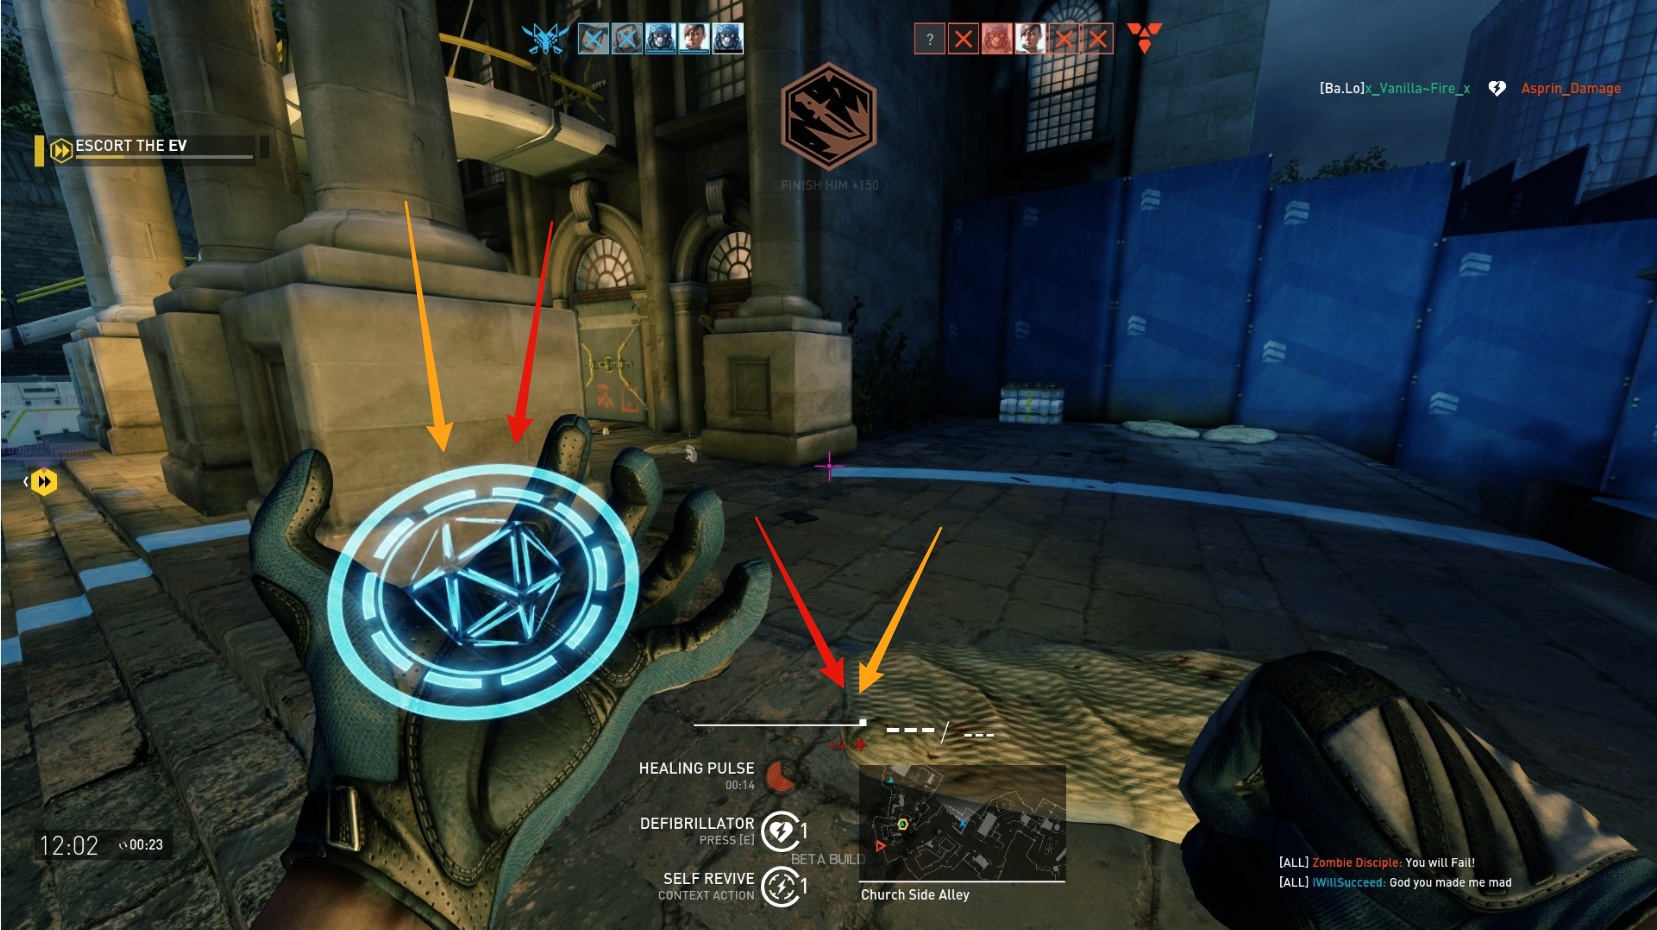
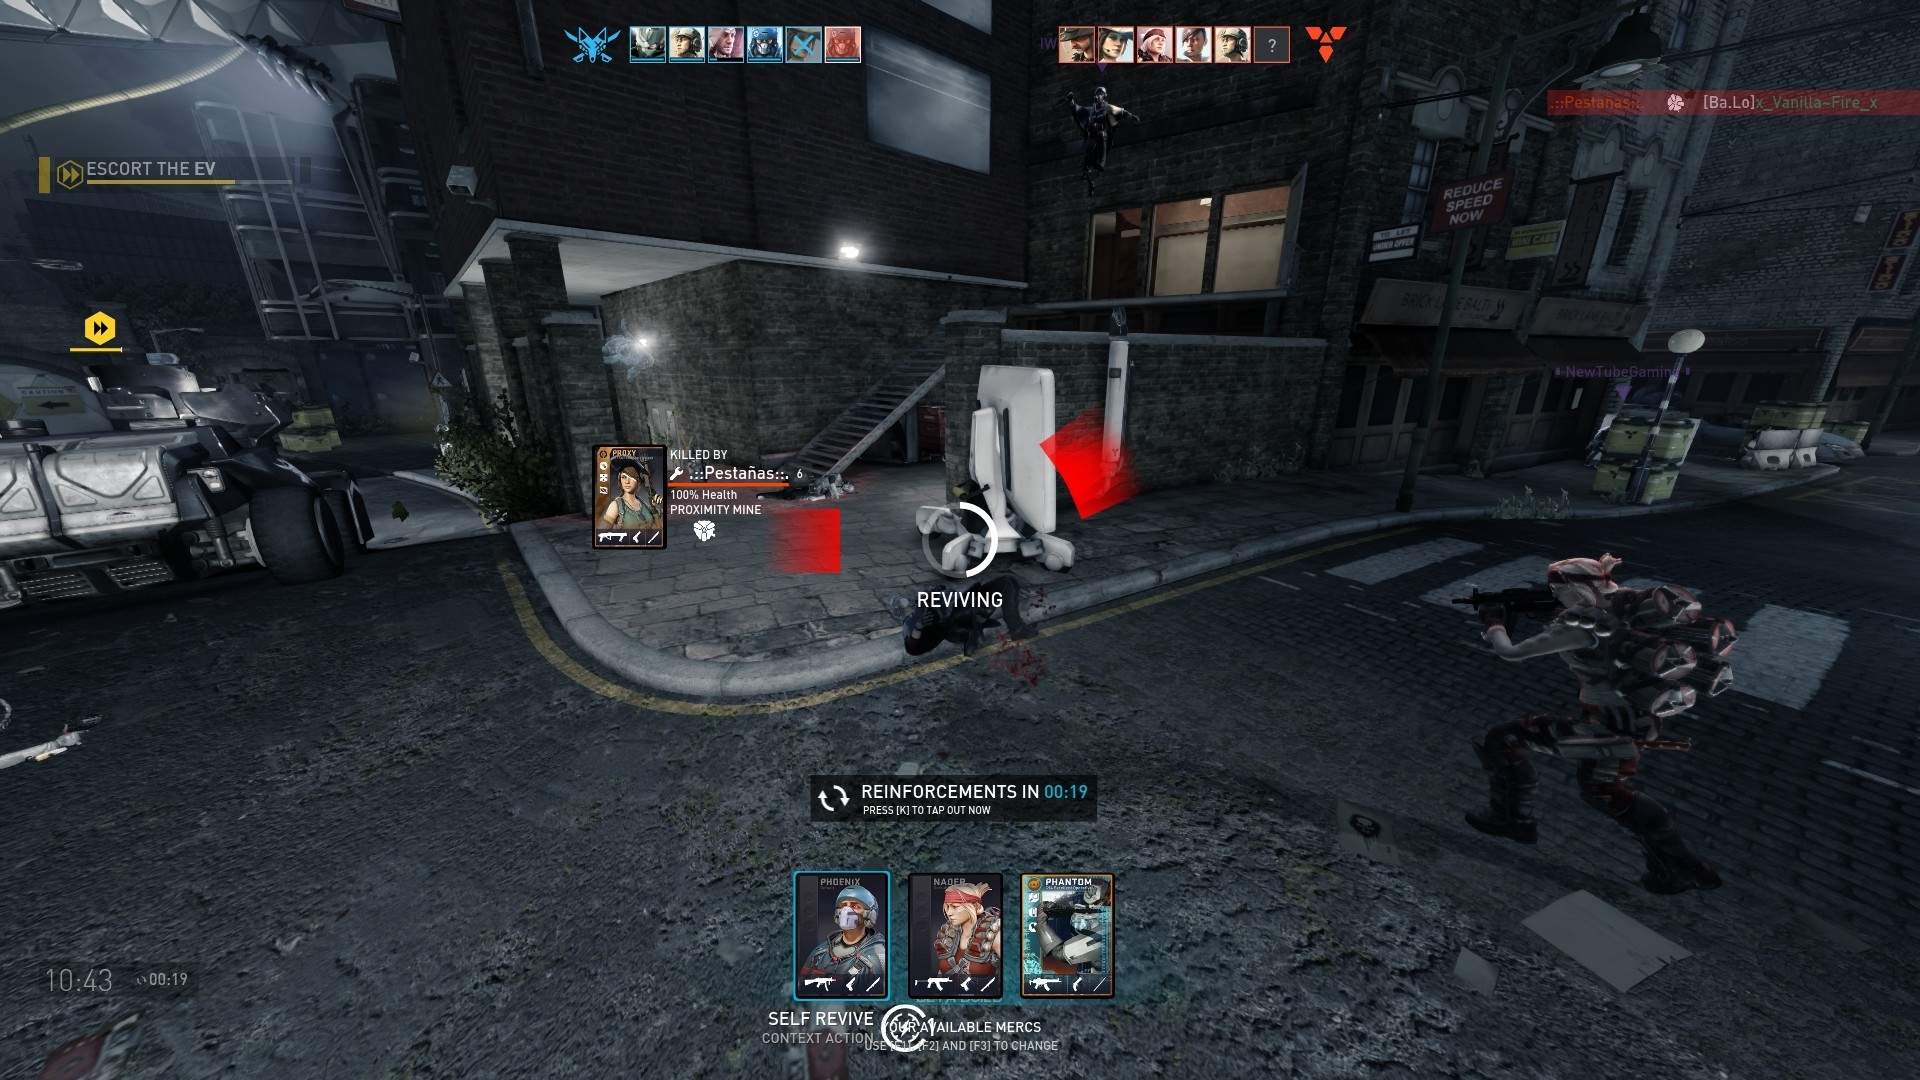
  1. His healing is INSTANT once released - no waiting for the heal to finish like with Aura or Sawbonez.
  2. Phoenix heals in a RADIUS around him - no need to aim a pack at someone.
  1. His heal applies to ALL teammates in healing reach - You don’t have to throw multiple medpacks down, you just have to worry about positioning to more effectively heal your teammates.
  2. His heal isn’t weakened in strength to himself! - He’s the only medic that gets the same amount of HP from his skill as other players (unless using potent packs)
  3. He doesn’t sacrifice maneuverability or effectiveness while healing - (especially when fleeing) he gets melee movement speed and can charge his ability while jumping and running (maneuvering). It’s like having double time but with your healing ability!
  1. He is a mobile decision making medic - At your discretion you choose when and how much health goes to whom.
  1. His “Healing Pulse” has an INSIGNIFICANT Cooldown when used correctly - more on this later, but you control just how long you CANT heal for based on how long you took to heal in the first place.
  2. He is Versatile as either a TOPPER or as a COMBAT EXTENDER. (he can choose to heal teammates out of combat to the brim, or he can simply give a short burst of healing to all of his teammates in the thick of the fight.)
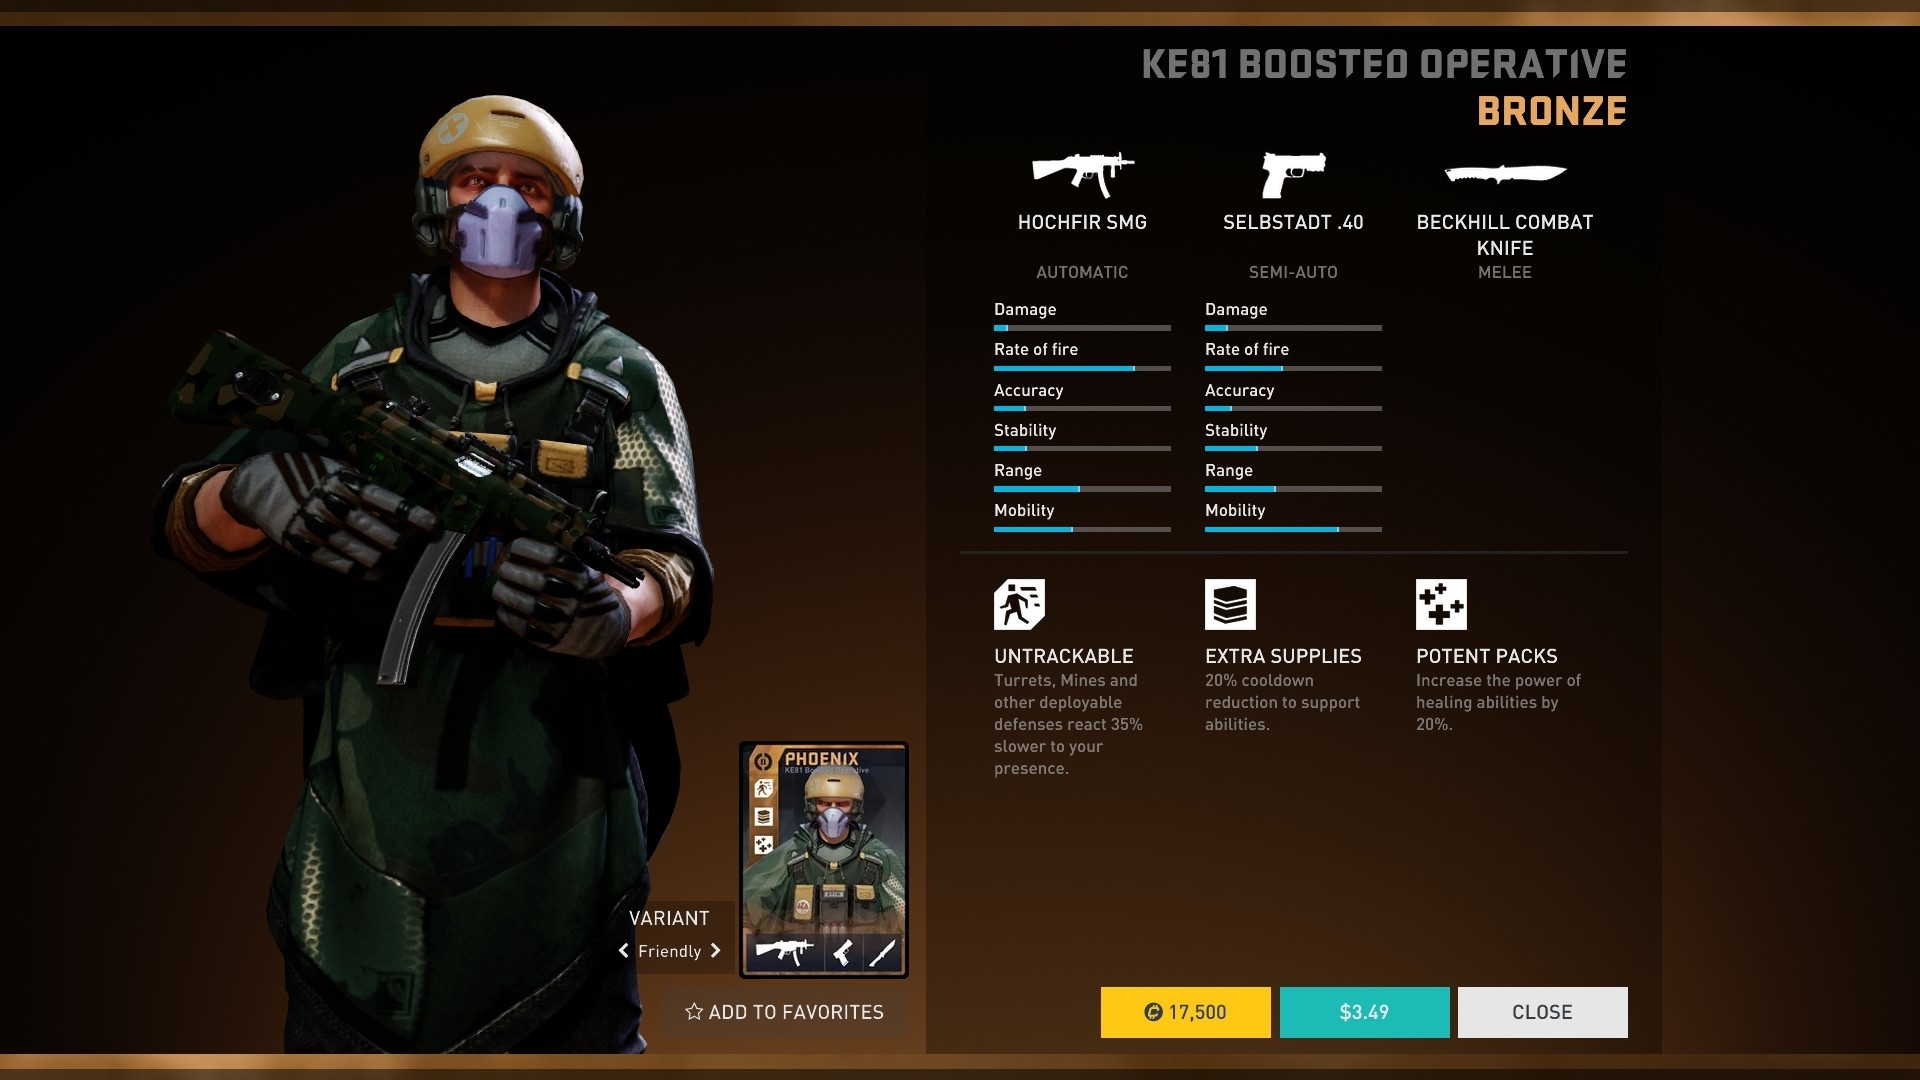
  3. He has access to a wide range of powerful loadouts and weapon choices.
CONS
YOUTUBE VIDEO

https://youtu.be/H9UVgyci_K8
I’ll figure out formatting for this youtube video link eventually, JUST YOU WAIT!

PROOF OF PHOENIX'S POTENTIAL


The rest of this guide will be going into the specifics of how to use him correctly, each of his different abilities, and some general tips that many players don’t think of or realize until many hours played with him or other medics.

MY PERSONAL GUARANTEE
MANY THANKS TO:
Change Log... because why not?
  • After several days of combining game knowledge and formatting, the guide was released!
  • Added colors to help emphasize major points. The guide was longer than a giraffe’s neck that was stretched by an inverted machine press, and some parts were unfocused or not explained correctly; many points were improved for brevity and clarity. Day after revisions are a necessity when you end up finishing and submitting stuff at 4AM it seems.
  • Tips from Equanimity and Firefly have been added. Added accreditation and thanks portion to the introduction.
  • Clarified a tidal wave of information. Added extra advice from several players, including quotes from Szkalot, mainly additions from the forum monkeys.
  • Table of Contents button was added to all posts. This broke later. Nothing stays fixed. :frowning:
  • Finished testing on Restoration exp. This elusive bonus is obtainable on all medics, was eventually removed, and used to mean “revived to full” bonus. I’ll be doing more work soon to see if it’s back (2018 June edit)
  • Greatly enhanced, clarified, and repurposed “General Situations” section (it is now the general improvements portion it was meant to be rather than a rambling mess of awesomeness).
  • Removed some dirty code and fixed several spelling, grammar, and punctuation mistakes.
  • Change-Log updated to look better and revised for ease of continuous updates. Gotta have dat Change-Log Boooiiiiii.
  • Changed location and formatting of certain parts of code and the guide itself for ease of access to both the editor and readers.

No real updates to the guide were necessary as numbers hadn’t changed yet. However I attempted to fix as many links ahead of time since many would be broken etc. as Splash Damage bought out their game rights from Nexon and transferred forum URLs. This required some guesswork that didn’t work. They also locked all the old content from the previous forums during this transition with a 2 week edit limit. I was locked out of fixing my guide or updating it EVER AGAIN! (Kidding, but it was for over a year that I couldn’t do anything, almost 2.)

THE UPDATE THAT BROUGHT FORTH A READABLE STEAM GUIDE!

  • Fully moved the old guide from the official DB forums as it was not able to be updated, and went through two full revisions and changes.
  • A large amount of unneccessary information was dropped and repeats were minimized unless the repeat had a purpose in multiple sections.
  • Several forced changes to structure since “spoiler” command also works differently and there’s no minimize function in SCUD (steam guide software…) were required. Doing this while maintaining the core value and integrity of what was originally in those sections on the forum has undergone several stages but it should be at an acceptable and still pertinent point overall.
  • Streamlined look and polished several times between interfering styles and the somewhat limited guide structure Steam presents.
  • Several pictures are yet to be added, a chart is still needed for cooldowns to better illustrate the text in those sections, and the video portion of the guide will be created and input soon.TM
  • Splash Damage has announced several incoming balance passes. Though the initial gun pass only hit the crotzni with an extra .1 second reload time, it’s very likely chunks of this guide may be blown out of the water if Phoenix is touched in the upcoming months. I will keep this updated.

Granted Permissions to clean up, fix, edit this guide into a well polished turd. As well as pretty much full trust of world domination inside the forums. But, one step at a time my little turd post.

  • Ported Steam copy back over to FORUMS, as well as began manually sifting through all of the broken links, new formatting requirements, and format changes to the forums to make the guide most readable. Why do people have so many conflicting formatting things?
  • Moved Changelog and thanks portion back to Introduction. Added in DETAILS (basically super old spoiler function) EVERYWHERE.
  • Still polishing the turd into a beautiful wax ball.
Known Issues/Bugs:

Restore exp may or may not exist anymore. There are no gun stats, this is not a bug. Weapon switch-offs from healing and turrets MAY or MAY NOT be a thing anymore either. Huh. Chart and video are STILL missing. Tons of broken links and crappy words exist after forum UI overhaul and lack of being able to edit… until NOW MUAHAAHAAHAHA… Ha… ha
Give me a bit of time to fix this yo. - June 2nd 2018.

Feel free to post here, or hit Vanilla~Firaga up on Steam with any information or fails you see with the guide. They will be fixed in a fashionable and timely manner.


New user post/reply limit
(Xenithos) #2

Table of Contents

  1. Healing Pulse
  2. Self-Revive
  3. General Situations
  4. THE ROLE OF THE PHOENIX
  5. Tips and Secrets (becoming all around better with Phoenix)
  6. Loadout Cards

(Xenithos) #3

1. HEALING PULSE

This is his MAIN ability, and should be used in place of having to revive teammates. You ALWAYS want to heal instantly, so that you can avoid having to revive players. A non moving Phoenix (Because you’re reviving someone) is a dead Phoenix.

[left]So, unlike all other medics, and as said previously, Phoenix’s healing is something special:
It heals in a circle around him with a certain amount of height to the field as well.
It heals 100 hp on a full charge (12 second cooldown), or
It heals 20-25 on a deliberate tap (5-6 second cooldown).
It heals INSTANTLY.
A full charge takes only 1.2-1.5 ish seconds to reach; however, it costs an additional 6 seconds of cooldown. (or less if you have extra supplies!)

(this is without potent packs (30-35 on short, and 120 on full) and without extra supplies (4 and 10 second cooldowns)

Why is it important to know numbers? Well, think about it this way. In 1.5-2 seconds of charging I can heal the FULL HITPOINTS of a SKYHAMMER, with only 12 seconds of cooldown when timed correctly. And this isn’t limited to just one skyhammer, but everyone around me.
With a literal healing pulse tap, I can heal a third of a proxy’s hitpoints to everyone around me, for only a 6 second cooldown.
This is MUCH better than sawbonez’ rate at getting health packs as well, since he gets ONE for ONE person every 10 seconds.

His field allows him the option of not really having to aim, but having to simply be near his allies.
[spoiler]This is unlike Aura, who can plop it down and go do whatever, somewhat Unlike Sawbones as he can leave it where as well, and completely unlike Sparks as she can REVIVR from a distance (AND SHOULD).[/spoiler]

So, imagine the possibilities of this ability, instant health regeneration!

I said above that his cooldown is tiny, why?,
In comparison with other medics and abilities, his cooldown IS tiny, but MANY Phoenix players hold his ability down for WAY. TOO. LONG.
Charge it, and RELEASE. Do NOT hold it while getting into the perfect position unless it will be extremely worth it. This will extend his cooldown all the way to 20 full seconds!

[spoiler]Phoenix only needs about six seconds to get the FULL charge, as in 100 hp. You’ll know this because the full shape appears in his hand, and it dings. As soon as it hits this, you should be ready to release it, and in position. this will only net you a 12 second cooldown. Compared to the fact that ONE Sawbonez pack is TEN SECONDS or that ONE sticky bomb has a 6 second cooldown, his ability DOES have a tiny cooldown for it’s effectiveness.
Using his ability at all causes a 5 second cooldown. So all in all, by the time you release a FULL healing pulse, (as in 100 hp) you’ll get a small 12-14 second cooldown. [/spoiler]
“Full Pulse”

Performing a “full pulse” is very important when Phoenix himself has almost no hp, or other members of your team have no hp. However, it is not that often that Phoenix will need to fully charge his ability to completely heal his teammates. Learn how long you have to heal to heal different portions. Remember, top off your teammates, or save it when the firefight starts and they need the healing.

Using his ability efficiently:
Almost always charge with “4” and swap to weapons and fire away, the heal will go off. It is not very effective to use the ‘q’ key for your ability. Crap, sometimes you should run with your ability out instead of a knife!
You should ALWAYS charge for a little longer than a tap, unless your team really doesn’t need it and you just want to fill a few hp here and there.

USEFUL AUGMENT EFFECTS:
[spoiler]Extra Supplies: Full charge becomes 10-11 seconds. Following people causes it only to be a 15 second cooldown. Tap charge becomes a measly 4 seconds. This is almost a must have perk.
Potent Packs: Full charge heals for 120 hp, 30-35 on a tap. Also recommended.
Healing Reach: Does exactly what it says it does, extends the field of his healing. ONLY look for this if you’re bad at being in the thick of things with your team. The other two are always more useful to have.
Quickdraw: this allows him to switch between his weapons AND his ability quickly. If your team needs that quick tap in a fight, then do it!
Get Up: (not useful for healing pulse) This allows you to pick up teammates better with the defibrillator. They get an extra 30% hp upon revive.
[/spoiler]

Also remember, it’s rare that you’ll need a FULL PULSE to heal your teammates or yourself. Charging is important though, just a tap isn’t that useful in a firefight. Especially when nades that can do 70-90 damage in an area are flying around! Try to put in at least a half-second’s worth of charge!

Extremely tactical uses of this ability are also covered under the tips and true phoenix sections.
Just you wait!
[/left]

Return to Table of Contents


(Xenithos) #4

2. SELF-REVIVE

It’s pretty self explanatory. You can pick yourself up after being “downed” in a short 3 second pickup time. Simply hold down “F.”

  • You will come back to life with FULL HP
  • Your ammo will stay the same, and the amount of ammo you died with left in the mag will be the same.
  • It has a minute cooldown (48 seconds with extra supplies).

IMPORTANT NOTE: You should never revive with less than 5 seconds until a new spawn wave, unless it is EXTREMELY tactical of you to get up, and you are almost completely sure you won’t die immediately and become “Long Spawned”. (As you can see, I tried to do it stupidly while a nader finished me off from a distance, however, the timing for reviving was good as there was 19 seconds left on the spawn counter.)

How it feels to rise up like the Phoenix, and then kill all of the oblivious or simply forgetful people around you:
[spoiler]http://coolvibe.com/wp-content/uploads/2011/08/phoenix.jpg
[spoiler]http://www.pcgamesn.com/sites/default/files/UndergroundGamePhoenix_1414142586.png
[/spoiler]
[/spoiler]

However, you can also be finished while getting up by experienced players, and during the time that you hold down ‘f’ by anyone. So be careful trying to use your ability; some will intentionally make you waste your ability and finish you while you rise with their knives or snipers.

However, let’s hope that you’re an Awesome Phoenix and you never die! (some may refer to this as being a coward and running, but screw them! Your KDR is important to you!)

Return to Table of Contents


(Xenithos) #5

3. GENERAL SITUATIONS

Basically, every situation may come down to a fight or flight scenario. Just make sure that you keep a constant spatial awareness about your surroudings. If you think you can take the enemy, then take 'em. If you can’t, then Run while spamming your healing pulse . It’s important that as Phoenix you keep your team alive, but also, that you yourself stay alive.

Also remember: If you were protecting a good Fragger or someone similar, and the enemies don’t know about you, it’s very likely that they’re close to dead. Prop that teammate back up and push with him against them!

Another thing to constantly remember. You have a healing pulse at any time you need it if you haven’t previously healed your teammates. So if you’re in the middle of an “extended firefight” you can duck out and heal. (or perform the Fletcher method from hints and secrets) So don’t lose your cool, and keep your aim on target. One of the worst things you can do in Dirty Bomb as any character is freak out or lose your cool. Keep your mind focused, and if you see a lot of enemies, just run while healing.

To Phoenix’s teammates: push the opponent if your Phoenix is just downed. This will force the player to either switch to you - likely giving your phoenix time to revive and heal you- or focus fire for the gib - which means you get a traded (or free and easy) kill because they’re focused on the dead player beside you. From “Szakalot” And vice versa; if you’re a phoenix with a competent team, encourage them to push past you as you’re about to die, distracting the enemy!

“If your teammates are fighting, its best to heal them as quickly as possible, just slightly more than a tap is enough. The worst thing that you can do is fully charge a heal that becomes useless when the player goes down and you have to switch to defibrillators instead.” I cannot stress enough how useful this is, which is why it was also covered under using Phoenix’s ability effectively! This phrasing was from Szakalot. It has been stressed several times, but another time can’t hurt! You can also longjump into the fight while charging your healing pulse in mid air.

If a teammate goes down outside of cover (very often in fact), you should longjump towards your downed teammates while charging in mid-air. The amount of charge you gain while charging in mid-air while on the way to the teammate is usually more than enough to get them on their toes and not have them mad at you for healing them for only 30 hp. After doing this, you can also tap a healing pulse for them and help out with the fight.

People to follow:[spoiler] You should almost always try to follow fire support and assault groups. This means ammo giving people, and Nader, Thunder, Fragger, and Rhino.
You should also try to follow any kind of group period so that you can affect more people with your pulse ability at once.

If a player is doing exceptionally well and you simply need support exp, follow them, and heal them when they need it. Some players can completely change the scope of the game just because they have a pocket medic. (AKA - YOU) Not to mention, you’ll get a TON of score because of their killing mayhem. [/spoiler]

People to avoid:[spoiler]

  • Don’t ever screw around with a decent Phantom. They will destroy you. And if they have chopper, you’re dead in one hit. If you spot one charging into your group, end him, then pick up. Don’t try to heal your teammates while he’s swinging away because he will just finish them.
  • Snipers - bolts. Especially if they’re good, since Phoenix’s head hitbox is one of the larger ones in the game. If you get winged, that’s fine, but a headshot will end you, and another shot will finish you. Instead of approaching them from a distance, sneak up behind them and infiltrate, or stick with your team.
  • Shotguns are more deadly to Phoenix than you may realize, their one shot capability can sometimes still apply to your 100 hp.

[/spoiler]

Return to Table of Contents


(Xenithos) #6

4. THE ROLE OF THE PHOENIX

Overall, The role of Phoenix as a Medic is a little sketchy. He’s built as an impressively good survivor and combat medic class. Sometimes you’re a better slayer because of your survivability than other mercs. But overall, you’re supposed to be a medic. But how exactly, should you medic to be the best?

  1. Healing at the perfect times - Over time your intuition will help, but there’s always a golden moment in a fight for you to healing pulse. Whether it be before you run away, or just as your team gets hit by a molly, you’ll soon know it. The goal for Phoenix is to keep everyone at full health constantly. But even that little extra health during battles can be just enough to turn the tide.
  2. The Instant Healing Ninja - This is the most evil thing Phoenix can do, basically, sneak up behind one of your allies that’s in a 1v1 or something, and charge your healing pulse so he’ll get it. Just as he’s about to die, release it. Laugh as your enemies die because your protected dude seems to never die! Muehehe! I’ve lost many times in 1v1’s due to a Phoenix healing the guy I’m shooting at. And guess what? You get experience for the kill he just made! :open_mouth: Also, he might just give you a :cookie: for being so awesome, who knows!?
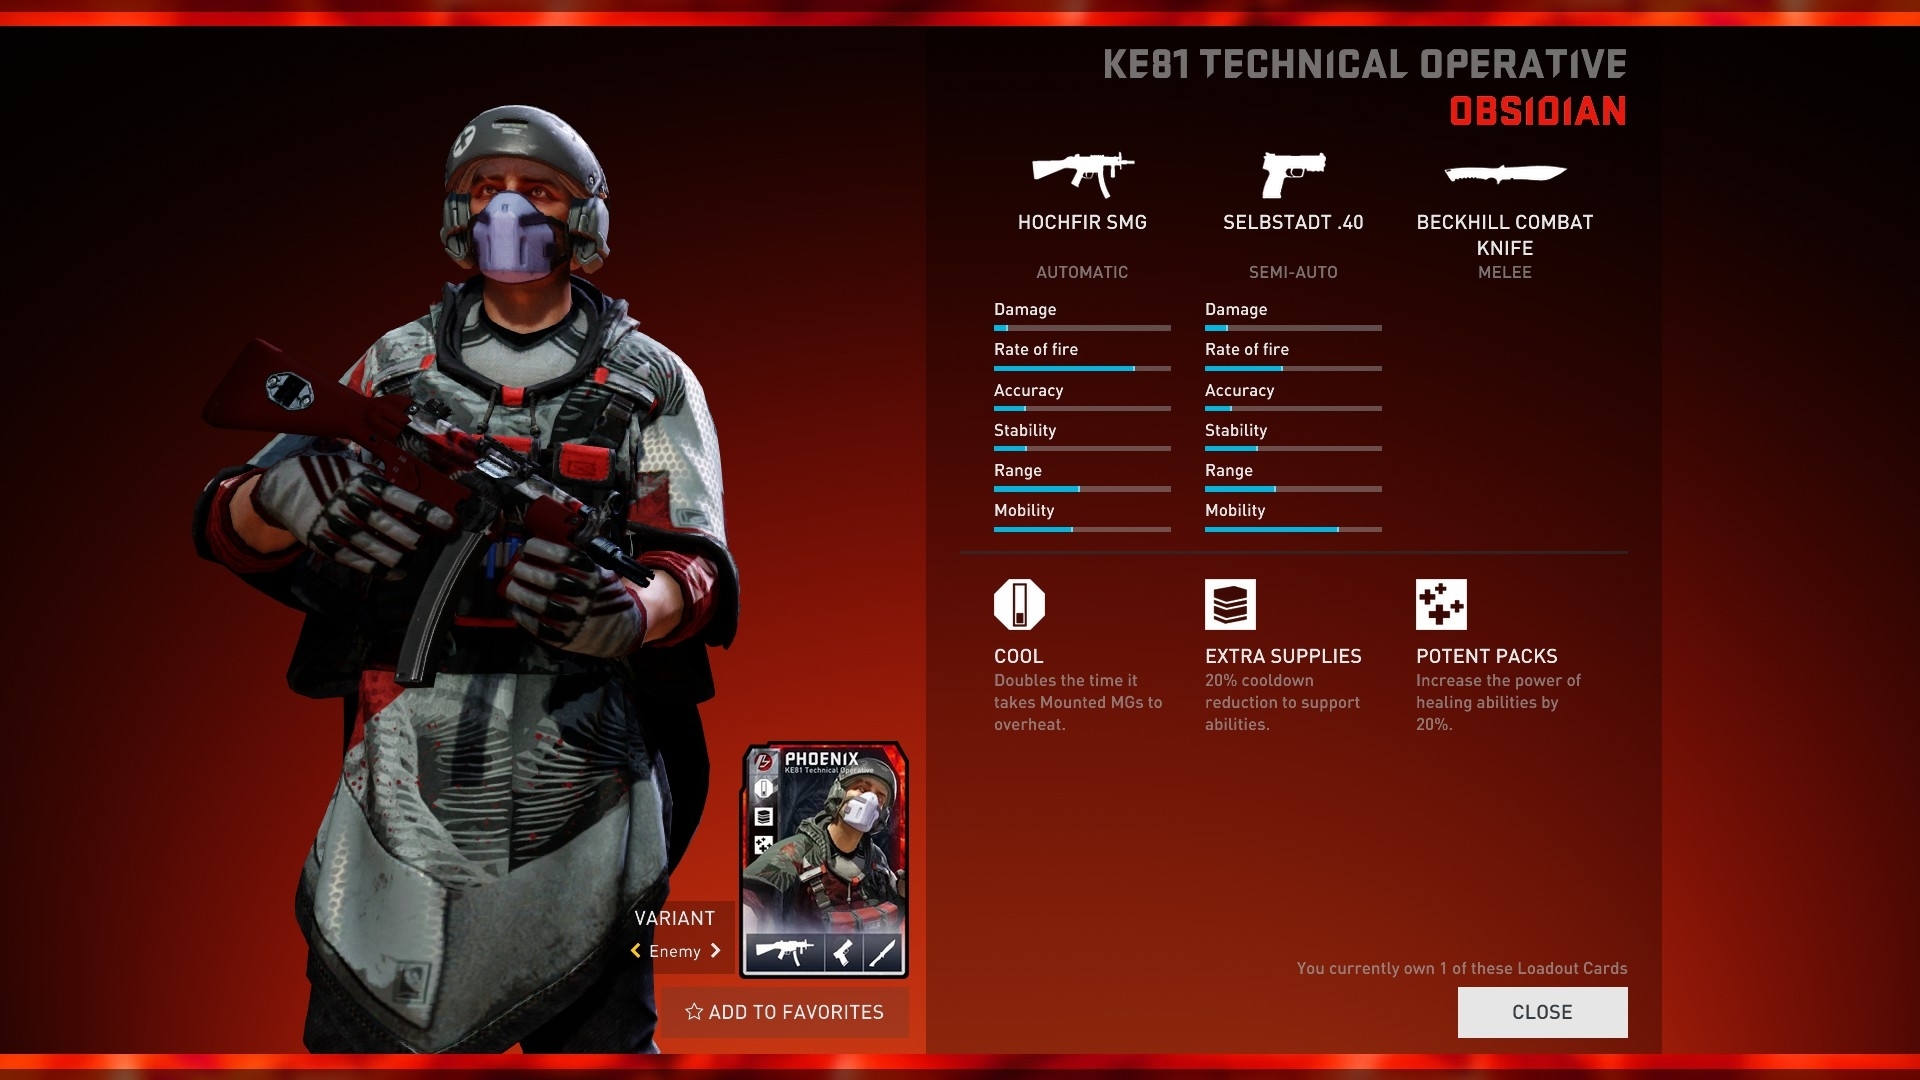
  3. The Coward - Phoenix can become nearly invulnerable if you simply revert to your chicken like ways. Run away from the fights and spam a half charged heal. You’ll make it, almost guaranteed!
  4. The Topper - This is Phoenixes true role in Dirty Bomb. He goes around to the people that are too far from other medics, and he heals them to the brim and runs away, or assists for a while. I refer to him as the topper because this is what I usually do. You also get bonus exp for doing this anyway, so you might as well. Sometimes, you’ll find a group that has slowly healed most of their hp, and you can top 3-5 guys off with a tap.
  5. Suicidal Heal - You can charge a heal and walk into a group with low hp, when you die, they’ll still be healed for whatever you had charged.
  6. Phoenix Brothers - This is a tactic, much like the legendary Aura/Rhino or Aura/Stoker combos. Simply grab another phoenix, and sometimes an Arty or something, and follow them. Aim at whatever they aim at. Most enemies get shredded due to the teamwork that YOU have applied. I’ve once downed four enemies in a hallway simply because I followed my Phoenix brother and picked them back up immediately when they died. I’m not joking, try it sometime.
  7. The Tbagger - That’s right, as a fully healed Phoenix, you can Tbag Naders! Go tbag them and enjoy, then self revive and tbag their exploded bits! It’s all a game anyway!
  8. I’ll add more as I think of them. Any suggestions will probably go here. These are not entirely meant to be jokes, but things that Phoenix should do, and will make him better, or at least more fun.

If you want to be the sexiest and best Phoenix you can be, then tips 1-4 need to be followed almost religiously (as often as possible).

Return to Table of Contents


(Xenithos) #7

5. TIPS AND SECRETS

So, where to begin? I have no clue. Let’s just jump right in!

  1. MG Nests! Unlike most characters, Phoenix is one of two that I would ever recommend to use on an MG. Phoenix has the ability to SELF-REVIVE after he dies on a turret MG since he usually cannot be finished behind an MG nest. So go kill a bunch, die, and run away.
    Also relative to MG’s - You can get off them quickly by swapping to a weapon while on them. This is instant, just like his healing pulse!
    [spoiler]https://gyazo.com/e557ade39c7679941136403006e8ca18.jpg
    Despite my “encouragement” of MG nests, I still don’t recommend it, nor do I think that the augment “Cool” (it doubles time until the mg heats up) is useful on him, as no one should fire for that long on an MG.[/spoiler]
  2. Centered HUD! - A centered hud is important for DB period, but even more so for Medics. This puts your own hp and abilities in an easy to see spot, as well as a minimap not far behind! Click the spoiler for more info!
    [spoiler]Video courtesy of N80. Go do this bois.
    https://www.youtube.com/watch?v=imph1l-NLNY
    FILE[/spoiler]
  3. The “Z” key! - As a medic, your eye needs to constantly be aware of team hp. Some people say look for the icons at the top of the screen, I say “screw that!” If you simply hold down Z, all objectives on the map, AND all teammates (WITH HEALTH BARS) will appear. Use this to your advantage, and hold down ‘Z’ often to see where the fight is at! (because your team is falling, and they can’t get up!)
    [spoiler]add picture from 02[/spoiler]
  4. Canceling abilities and ammo! Phoenix’s abilitiy is also cooler than Aura,sawbones,sparks, etc. Because When Charging it with 4 (how I recommend using it) you can swap to a weapon with the keys (as in 1 for primary, or 2 for secondary) and the heal will go off. It won’t cancel unlike other mercs. This is also true with guns, you can swap weapons (or if enabled in the options) sprint/press reload again once the ammo counter fills again. This skips the rest of the reload animation, offering you another few precious seconds in battle. So to repeat: charge his pulse using 4, then swap to another weapon for it to go off instantly and fire away. (TY to Firefly and Equanimity) [spoiler](This can also be done with Defibrillators, but it won’t revive. It’s simply used to cancel the animation of it snapping. This is EXTREMELY useful when the person you were about to rez got finished.)[/spoiler]
  5. The Fletcher - This is a joke based on how many fletchers bounce around while throwing their stickies. If you need some extra time to distract the enemies while charging a pulse or a defib, Jump around and off walls while charging, etc. But remember, you want to be on the ground when finally aiming at them. I personally call this bunny hoping. (because you’re hoping they won’t kill you while you jump around like an idiot. (“Firefly”)
  6. Restore exp - WIP. [spoiler] I’m not sure if it is because you heal someone close to or all the way up to their full hp, but sometimes you’ll get a support exp tip that says “restored.” [spoiler]add picture of Phoenix on the rock with “restored” exp tip[/spoiler]This is why I recommend playing Phoenix as a Topper Offer. Not necessarily as a hardcore heal-em-up Medic.[/spoiler]
  7. Run with “4” - Instead of running with your melee out, (because running with a knife makes you faster) instead run with your hands! This way healing people is easy to do because you don’t have to switch to your ability! Not to mention: It looks REALLY cool.
  8. Support Exp Grinding - You can also steal other medics healing because yours is instant. On TOP of this, never feel bad healing groups that have close to full hp in the first place, doing this still gives you the support exp boost from whatever they do afterwards. Mueheheh.
  9. Watch the Spawn Timer! With that new centralized HUD I recommended, it’s easier than ever! If It’s close to a spawn wave, then maybe being the hero isn’t that bad. But then again, maybe it is.
  10. Dying in an Opportune Fashion - Of course, you’re not supposed to die as Phoenix. But when you do, you want to be able to abuse your Self Revive skill. Try to die behind cover (as in moving behind cover while dying, or simply shooting from behind cover) as this guarantees you can revive. Also, make sure to not revive at bad times, or when someone is waiting to finish you as you rise.
    [spoiler]On maps with gas tunnels you can run through it with a pulse ready. Release it as you go through to heal. If you die while running through, let the cooldown on the pulse reset, then revive and run the rest of the way while healing. This allows you to be sneaky and even more deadly! (This is a tip from “ValkyrieHunter32”) I myself have done this on Underground to plant the bomb quickly![/spoiler]
  11. Practice makes perfect. :naughty:
  12. Defibtastic! - Make sure you always charge that defibrillator when you can! And better yet, it makes a cool sound for you to know when it’s ready! Sometimes, if your ability is still on cooldown, and a teammate is going to die anyway, start it charging to instantly pick him up. You can also long jump into combat while charging a defib, Surprise!

Return to Table of Contents


(Xenithos) #8

6. LOADOUTS


The one you have if you’re cool. :naughty:

All loadouts:
[spoiler]Generation 1 loadouts: (available only through store)
https://gyazo.com/0f29aef42396072250307af4d1fd10da.jpg

Generation 2 loadouts: (available directly in store or through trading up)
https://gyazo.com/a2bf0f7eef4c4844514eca0d01d4a1b0.jpg
[/spoiler]

Phoenix has the Crotzni, Hocfir, and Kek - 10 for Primary weapons.
Selbstadt, M9, and Caulden (my personal favorite) for Secondary weapons.
And the standard Cricket Bat, Beckhill, and Stilnotto Stiletto for melee weapons.

So… What loadouts are the best for Phoenix? How do I find the one that’s right for me?
First off, I recommend wholeheartedly that you pick up Extra Supplies or Potent Packs. “Get Up” is nice too (it allows you to give an extra 30% hp to people you REVIVE, this doesn’t include yourself). Also important, is that Extra Supplies also applies to your Self-Revive ability. Allowing it to cool down 12 seconds faster than usual.
[spoiler] “Extra supplies is the best perk for Phoenix! Being able to heal as often as possible is much better than being able to heal for 120 (if you have potent packs) once and then waiting forever. It also particularly supports Phoenix’s aggressive peek-heal-peek playstyle. There is just so much more versatility to being able to reliably have small or big heals all over the place. Extra supplies all the way.” - An almost direct quote from Szakalot. [/spoiler]

    [b]Second[/b], guns are important. If you cannot use the Crotzni, or the Hocfir, or you're completely unreliable with the Caulden (I love the caulden btw) or maybe you just hate the cricket bat (YOU MONSTER), then don't get that loadout. You're a combat medic, make sure you can kill AND heal. (healing should be your top priority, of course)

      [b]Thirdly[/b], keeping it real, Phoenix doesn't really have that many awesome loadout cards, despite him already being in gen 2. Many of them are combat oriented, or have perks I wouldn't want despite them being combat oriented. Such as Untrackable and Enigma. I'd much rather have drilled and Bomb squad or something. He's not Sparks with the 383. 

       [b]Fourthly[/b], Phoenix can still be fun with random loadouts, just like how Sparks can end up with an "inferior loadout" that ends up being really fun to play as. Such as cricket bat only sparks from gen 1:

[spoiler]https://gyazo.com/26243dc98639612e18dfd21a53e5ce8e.jpg
So much fun to long jump at people while swinging wildly! Oh, Sparksypoo![/spoiler]

However, that being said, these are my main picks:
Gen 2:
[spoiler] Kek 10 - https://gyazo.com/e8a0fa20a82cb6db37a49d56b39ba94d.jpg I recommend this specific one over the other two because even though they have the preferred “medicinal” perks, their other perks don’t compare with this one’s playstyle though. Also, enigma on Phoenix is actually more useful than some may realize as it effectively takes away one of his threats: Snipers. (TY for the tip: Equanimity)

Hochfir - https://gyazo.com/a5ee8c4be8c605e81cdca3c9653fe670.jpg
This is honestly a personal favorite. The good combat perks make it a keeper, and so do the weapons. Get Up is also useful, even if it’s not what I prefer.


The most loved Phoenix out them all. It has the two best perks for it’s main ability, and a very reliable combat efficiency. This also used to be the wide favorite from gen 1 as well.

Crotzni - https://gyazo.com/1b56238cf07715f4da214524524e50c5.jpg
The second awesome card for Phoenix.

[/spoiler]

Remember: Although Phoenix is a Medic, his loadouts and his playstyle compliment combat very much. This is why he’s generally referred to a combat medic along with Sawbones. However, you should never forget that he’s a Medic, ever.

Return to Table of Contents


(Equanimity) #9

Excellent work good sir. May I add a secret I learned from watching someone else’s half-guide? Apparently if you switch weapons to end your heal animation (instead of just releasing the key) you can use your weapon without having to wait for the ‘end-heal’ animation, allowing for quicker heals and gun play. Also you can cancel your defib animation while charging in the same fashion. An example can been seen in this video from this reddit post: https://www.reddit.com/r/Dirtybomb/comments/4mnqyf/i_was_planning_to_make_a_phoenix_tutorial_but_i/


(Xenithos) #10

Thanks, I actually knew that, and meant to also talk about canceling the MG. It’s been a tiring 9 hours, I’ll put it in after I get some sleep! Many thanks again!


(Equanimity) #11

To note, I played a few games with Phoenix (bae) last night and I think they removed the “Restored” exp bonus. Was still able to double anyone else’s exp in the game though.

Btw I got that healing reach/get up KEK-10 loadout in cobalt on a trade-up. Super happy about that. ^^


(Xenithos) #12

[quote=“Equanimity;189131”]To note, I played a few games with Phoenix (bae) last night and I think they removed the “Restored” exp bonus. Was still able to double anyone else’s exp in the game though.

Btw I got that healing reach/get up KEK-10 loadout in cobalt on a trade-up. Super happy about that. ^^[/quote]

I hope you enjoy it! I’ve confirmed that the Restored" exp bonus is still there with some testing last night. However, I can’t figure out anymore what it’s given for. It’s completely exclusive to Phoenix, but I’ve got screenshots of it still. I used to think it meant for topping off allies to nearly full hp… I’m going to do some more testing so I can also fill in the blanks tonight.

@Equanimity Do you really enjoy that Kek-10 loadout?


(Equanimity) #13

[quote=“Xenithos;189194”][quote=“Equanimity;189131”]To note, I played a few games with Phoenix (bae) last night and I think they removed the “Restored” exp bonus. Was still able to double anyone else’s exp in the game though.

Btw I got that healing reach/get up KEK-10 loadout in cobalt on a trade-up. Super happy about that. ^^[/quote]

I hope you enjoy it! I’ve confirmed that the Restored" exp bonus is still there with some testing last night. However, I can’t figure out anymore what it’s given for. It’s completely exclusive to Phoenix, but I’ve got screenshots of it still. I used to think it meant for topping off allies to nearly full hp… I’m going to do some more testing so I can also fill in the blanks tonight.

@Equanimity Do you really enjoy that Kek-10 loadout?[/quote]

Oh interesting. Maybe I just wasn’t topping people off much. I usually only heal people at near-half and only tap heal to keep my CD low. I’m not sure what it is for either but I wasn’t seeing it at all. Definitely post your results and I’ll try and do the same.

Oh yeah I absolutely love the kek-10. First time I used it was on the pre-emp phantom w/ a ReV event loadout and being able to run n’ gun with it and his old cloak he was actually really strong. I soon followed up with trying it on bush (who I actually use the blish on now because I got used to blish from fletcher and aura, and I like his lock on + steady loadout) and finally when I could afford phoenix instantly stuck with it on him. I have a really nice crotzni loadout on sawbonez but I keep finding myself wishing I had a kek-10. The two are really comparable, though. The hochfir feels really weak on anything but medium-close range to me, by comparison. The healing reach perk lets me heal more people at a time with out having to over-commit, the AoE actually feels huge with it, and get up lets me do quick charge longjump rezs, getting most people to a comfortable level so I can save my heal cd for people who will need it on the fly, or myself, and giving me more time to use my gun(s). The enigma is just a nice little perk to counter pesky vasillis or redeyes, which really are one of phoenix’s biggest problems because snipers can shrek you pretty hard and then gib you without a chance to self-revive, not to mention general range limitations on SMGs in general. I’m also really bias towards the bat. While gibbing with it is slow, that doesn’t matter too much if you’re going to risk getting close enough to use it anyway, because you shouldn’t do that unless you’re safe. Hopping around and smacking people with its long range just feels stupid good, lol.


(Xenithos) #14

I like what you said there relative to enigma, I’ll add it to the description shortened for that loadout. :wink:


(Equanimity) #15

@Xenithos “(This can also be done with Defibrillators, but it won’t revive (I think? need to check again))”

You are correct. It can be used to cancel the defib ‘firing’ animation, so you don’t have to sit through it to switch weapons when you had been charging defibs for a downed enemy who wound up getting finished before you could rez them. It saves you at least a good second.


(Equanimity) #16

Was look in the game code and found this in associaton with the “Restored XP Amount” line:

m_XPInfoSupport[XPTSupport_HealedDebilitation]

Maybe it means when you heal someone who was just debiltated by aimee? Maybe that’s why I didn’t see it? I’m not sure. I feel like I’d notice if I was healing someone debilitated and receiving that on other mercs, at least. With Phoenix maybe not. Maybe it is glitched to only work with Phoenix?


(Xenithos) #17

It’s strange that this line says “Amount.” At this point, I’m bewildered, As 90% of the time I heal people I get the Restored thing, but they’re not spotted by Aimee because there’s no enemy aimee. I wonder if healing completely gets rid of spots… Probably not. I’m going to go ahead and ask this as a Question under the General tab, hopefully someone awesome comes to our rescue.

I’ve gone ahead and made it an official WIP (sort of removing it) spoilerized!


(brennanfreak) #18

I was tempted to make my own but I was too lazy… But I will add a dirty secret that most phoenix players know

On maps with gas tunnels you can run through it with a pulse ready let it off and if you die let the cooldown reset, revive then run the rest of the way and get that ninja on.


(Xenithos) #19

I wasn’t going to include that because I never encourage dying, But I’ll just put that under Suicidal Phoenix. (Under the role of the Phoenix part)[quote=“ValkyrieHunter32;189238”]
On maps with gas tunnels you can run through it with a pulse ready let it off and if you die let the cooldown reset, revive then run the rest of the way and get that ninja on.[/quote]


(Equanimity) #20

I never actually thought about that. I usually am tunnel visioning allies, current objectives, and enemies, but it is god damn brilliant! lol