GTKRadiant - misc_gamemodel + script_mover


(Young Fox) #1

Hi to all of you,

I know it’s been a while since the game is old but I’m currently creating a map via GTKRadiant , and after 2 days of searching, I’m stuck with a script_mover

Let me explain :

I found this tutorial: [h ttps://www.surfaceg…le_mover_part2/](h ttps://www.surfacegroup.org/tutorials/wet/simple_mover_part2/)

I followed it to the letter except that I, it is not a tank , but a police car , to facilitate my life I downloaded it on Internet, in file .max, I opened in 3DSMax , the model consists of 3 groups: the body of the car, the windows and the siren, I, at first, converted into file .ASE , except that I discovered that in .ASE file is only assigned to static objects, so impossible to use with the script_mover , so I reconverted the model, from the .max file, into .md3 file, except that it displayed without textures in GTKRadiant , to remedy this problem, I downloaded the software Misfit Model 3D and I exported it, again, in .md3 file. At this moment I am told that there are too many vertices on my model, I merge the vertices, and … miracle, the file is exported correctly.

The file opens so in gtkradiant with its texture, I give it the value and key

classname: misc_gamemodel,

targetname: police_car_a

scriptname: police_car_a

as shown in the tutorial above

I compile my map in .bsp file, and the copy in my file /etmain / maps

But when I launch it in Enemy territory, I get this message:

Quote

R_loadMD3:

models / mapobjects / etc … has more than 1025 greens on a surface (2044)

So I exported the 3 groups (body, glass, siren) each of their sides, each is a targetname and a scriptname as in the tutorial except that when I run my map the game freeze and stops

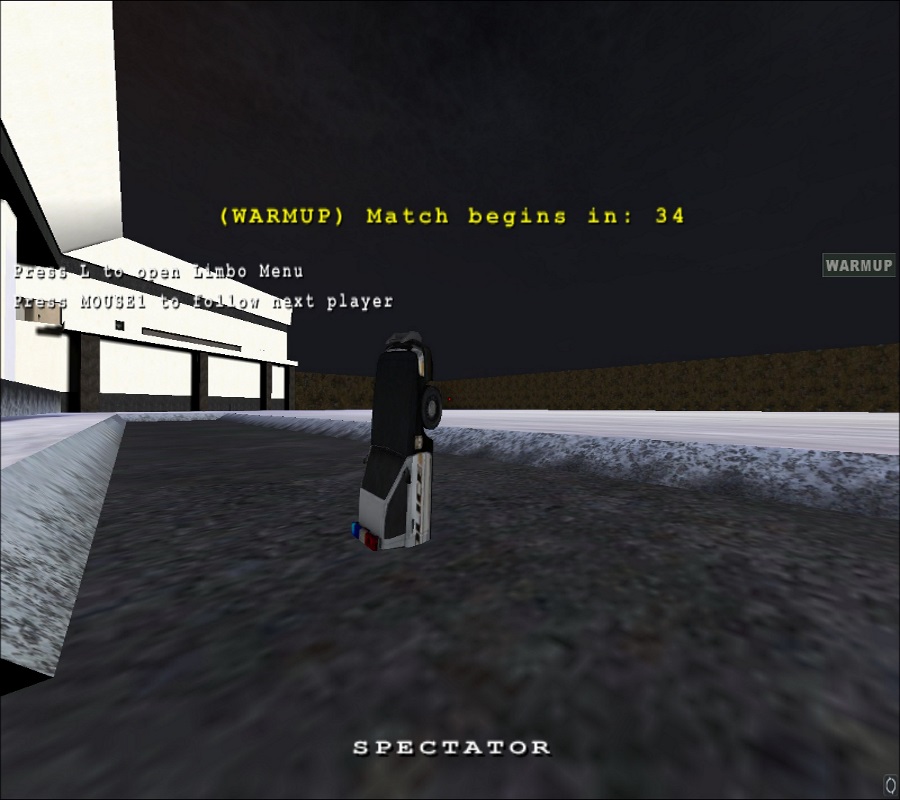
So I changed the lines " attachtotag … tag _… " by reversing the two entities and my map is launched but the model remains invisible … I hear the sound of script_mover but without the model.

I also tried to put a " misc_mode l" instead of " misc_gamemodel " but when the map starts my model remains static and seems not to be attached to t he script_mover

So concretely what I would like to do is to lower the vertices of the car (the Pro optimizer , the Optimizer and the MultiRes are not great), would there be a way to “compress” them?

And if in the process, someone would explain to me the line of the script " attachtotag police_car_a tag_police_a " What I do not understand here is what the " tag " represents

Thank you in advance ! it will save my life !!!

Here is my script and some pictures

Quote

game_manager
{
spawn
{
wait 50
wm_axis_respawntime 8 // Axis respawn time
wm_allied_respawntime 8 // Allied respawn time
wm_set_round_timelimit 15 // Map timelimit
// Stopwatch mode defending team (0=Axis, 1=Allies)
wm_set_defending_team 0
// Winner on expiration of round timer (0=Axis, 1=Allies
wm_setwinner 0
}
}
police_a //scriptname of script_mover
{
spawn
{
wait 800
followspline 0 sp_01 50000 length 32 wait //spawn the tank to here
trigger self police_path //goto tank_path
}

trigger police_path
{
    playsound sound/mapa/sirene_police.wav looping volume 600
    //play a tank sound
    followspline 0 sp_01 100 wait length 304
    //this says goto sp_01 at a speed of 100 and don't look at

//the next command until after waiting 304
followspline 0 sp_02 200 wait length 304
followspline 0 sp_03 300 wait length 304
followspline 0 sp_04 300 wait length 304
followspline 0 sp_05 300 wait length 304
followspline 0 sp_06 300 wait length 304
followspline 0 sp_07 300 wait length 304
followspline 0 sp_08 300 wait length 304
followspline 0 sp_09 300 wait length 304
followspline 0 sp_10 300 wait length 304
followspline 0 sp_11 300 wait length 304
followspline 0 sp_02 300 wait length 304
stopsound sound/mapa/sirene_police.wav
//add more lines for how many more splines u have
//notice that you don’t include scripting for spline controls
}
}
police_car_a
{
spawn
{
wait 800
attachtotag police_a tag_police_car_a
// this attache le tank_shell au scriptmover tank
}
}


(KeMoN) #2

Hi there @FoxyBrown23

Tanks in ET are a pain, so your question is very understandable and especially, since you provided so much background information it’s good to know what you have already tried.

tag

A tag is basically a defined point in space that is included in the model. As the command attachtotag implies, these points are used to attach other models to your host model. I have opened the Churchill tank in Nphernos MD3 Compiler to show what the tags do there. The tags are represented by those little colourful things that have one line according to each axis (X, Y, Z).

On the tank body you see that you have a tag_turret. This is used to attach the turret model onto. In the Fueldump script (from pak0.pk3/maps) that is done by the section below, where the tank_turret entity gets attached to the tank entity (script_mover).

tank_turret
{
	spawn
	{
		wait 500
		attachtotag tank tag_turret
	}
}

(@Moobabe we urgently need a way to indent text within blockquotes or use line breaks in [code] tags! It’s quite hard to follow code that is not indented!)
//EDIT: Thank you Maisy for the clarification below.


In the turret model itself are three tags. One tag_flash for the gun flash. one tag_player for correct placement of the player in the mounted MG and one tag_turret, of which I’m not entire sure why it’s there. The attachtotag command simply takes the origin of the model and attaches it to the tag of the host model and doesn’t need corresponding tags in the to-be-attached model. @ryven maybe knows why that’s there.
Anyway, the section below is again from Fueldump script and shows the gun flash when the tank shoots.
trigger run is called when the tank shoots, it then attaches the flash to the gun, waits for 50ms and then calls the next routine.

tank_flash
{
	trigger run
	{
		setstate tank_flash default
 		attachtotag tank_turret tag_flash
		faceangles 0 90 0 50

		wait 50

		trigger tank_turret blow_door
	}
} 

I do hope that helped a bit with understanding what tags are and do.

What do you need to do?

You need to decide on a base model, likely the body. In that model you need to implement a tag (e.g. tag_body). Where to put that tag completely depends on where the origins of your other two models glass and siren are. If they have the same origin as the car body, then simply put the tag_body at the model origin. I believe @WuTangH or @twt_thunder could be of help here.

Then you need to create sections in your script for these two entities (which both need to be misc_gamemodels) according to the tank_turret entity in Fueldump. In the end you want to have a script_mover entity car in your map that has model2 key set to the path to your body model. Then you want two misc_gamemodels in your map, one car_glass and one car_siren.
In your script you want the following sections:

car_glass
{
	spawn
	{
		wait 500
		attachtotag car tag_body
	}
}
car_siren
{
	spawn
	{
		wait 500
		attachtotag car tag_body
	}
}

You do need to create a .tag file of that model! Otherwise it won’t work! For that simply import your model into the md3_to_tag tool, but I guess @WuTangH and @twt_thunder can help you there.

If you need anything else, just post back here.
Good luck


(Young Fox) #3

A big thank-you !!!
I do not understand how to identify the “tag_”, everything is clear now!
Thank you ! !!!


(Young Fox) #4

EDIT: Do you know how to add a tag in 3DS max? (in Npherno I can not see the tags even after using the “md3_to_tag” tool)

Does this have a relationship with time tags?


(KeMoN) #5

Ah sorry, those are two different aspects. The md3 to tag tool exports an external .tag file. You need to do that for all host models, so those models that get other models attached to themselves. This tool doesn’t add tags into the model. Unfortunately, I’m not a modeller myself, so I can’t help you with actually adding the tag itself to the model. @WuTangH and @twt_thunder usually help me with that.


(Young Fox) #6

Do not worry, you were very clear and really enlightened me about it! Thank you again and I just hope that one of them answers this post :slight_smile: are they often connected?


(Young Fox) #7

Another question
I managed to import my model in one piece, (thanks to Noesis which allows limits vertices) which avoids me to split the model, at that moment, it still needs a “tag” for my model? and if there is no need to split the model, what should I put in the script? thank you !


(WuTangH) #8

Hey there,

Unfortunatly I dont use 3DsMax so I dont know how to set up tags there…
Tags used to be rectangular triangle object without metarials, that you rename to tag_[name] right inside the model editor and then simply export it to MD3… thats the oldest method (I think), and f.e. MilkShape 3D handles them like this.
However, it changes from software-to-software. When you look f.e. at MisfitModel 3D, instead of triangles you must create an object called “point”…at least thats what they said ( http://www.misfitcode.com/misfitmodel3d/olh_quakemd3.html#tags ).
Then in Blender, it is an object called “arrow”… But one thing that is kept, is that these objects must be called tag_[name].

Now, when your model is in one piece you dont need tags. But also it will move all parts always as one piece. (Lets say ET tank would have to turn always when its turret need to rotate).
In script you can simply delete car_glass and car_siren scripts then, as they dont exist anymore, and attachtotag parts in general, too… So you should just keep script_mover entity I guess.

One last thing to mention - we, ET mappers, modders, modelers, coders etc have a discord channel, you can join us and maybe we will fix things faster there :wink:
Link - https://discord.gg/e5fQGEU


(Young Fox) #9

Hi Wuthang! thanks to you for your answer, in 3DSMaxs there is a tab> modificator> edition mesh
according to you; where do you go to create the beacon?
Here are some pictures to be more precise
h ttps://imageshack.com/i/poTT3n1kp
h ttps://imageshack.com/i/pnjwvHYup
thank you for the link of the discord :slight_smile:


(KeMoN) #10

It’s good news that you managed to set the car ready as a single model and didn’t have to split it up in the end. This eliminates the need for tags now, which is good news for you. You can simply follow the tutorial you linked above.

These are all the keys a script_mover can use or at least the ones you need.
In the model2 key, you should put the path to your model (e.g. models/Foxybrown23/car.md3)
You do not need to actually place the model into your map, this is done by the game later-on.
The clip of your car is the actual script_mover, which also should have an origin brush. That origin brush corresponds to the origin of your model. In the shot below you see a little cube brush in the middle of the selection, that is the origin brush. Your model gets automatically ‘attached’ to that one. (I put ‘attached’ in quotes, because you do not need to use the attachtotag command or anything here, simply the model2 keys.) If you already have your splines like in the image below, then simply import your model into Radiant as a dummy. Adjust its position so it fits the road. In that model you should see a similar point icon as you saw in the 3D software. This point is the origin. On that point place your first spline entity and the origin brush of your script_mover/clip, which you first adjust to fit the position of the car.
Then simply adjust all following splines to follow it and you should be good. Delete the dummy model again after you’ve adjusted everything, as it gets attached by the game later anyway.

Now that you only have a single model, the tank tutorial should be more helpful again regarding what you need to put into your script etc. If not, please post back and we’ll figure it out.


I


(Young Fox) #11

Thanks, i’m doing some tests!

*Guys, I have a little problem: Noesis apparently compresses the summits, yesterday I thought I succeeded but in the end it is not the case, here is the link that I was given h ttps://jkhub.org/topic/10169-splitting-up-a-model-with-noesis-fast/?hl=maxverts, I do not understand the procedure very well (I know, I’m bad ^^ …) Anyone have any idea how this software works?


(Young Fox) #12

Good I succeeded!
Little summary!
I downloaded the model,
I put it in 3DSMax
I added the textures and exported as an .md3 file,
I imported it in Misfit Model 3D
I merged the vertices, then I exported it to md3 (it applies the texture)
Infact, it is not a question of lowering or removing the vertices, it is necessary to divide the vertices, for that I imported my model (after having exported it in Misfit) in Blender
We switch to Edit mode (at the bottom of the 3D window) with L, we can select a mesh group
With C, we can “paint” the meshes. When we enter edit mode, I hit C and then deselect the parts I did not want separated until the number of “Greens” is less than 1025, I press “P” then " Selection “the separated part becomes gray and the rest is in” grid "mode. I continue until all parts of my model are less than 1025., then export to an .md3 file
In Radiant GTK, I deleted my model, I “brushed” with the texture “metal clip” and another brush with the texture “origin”, the following values ​​were attributed to me:
Value , Key
targetname : police_a
scriptname : police_a
models2: models/mapobjects/…etc/police_car.md3

And I changed my script so that it looks like this:

Blockquotegame_manager
{
spawn
{
wait 50
wm_axis_respawntime 8 // Axis respawn time
wm_allied_respawntime 8 // Allied respawn time
wm_set_round_timelimit 15 // Map timelimit

	// Stopwatch mode defending team (0=Axis, 1=Allies)
	wm_set_defending_team 0
	
	// Winner on expiration of round timer (0=Axis, 1=Allies)
	wm_setwinner 0
}

}
police_a //scriptname of script_mover
{
spawn
{
wait 800
followspline 0 sp_01 50000 length 32 wait //spawn the tank to here
trigger self police_path //goto tank_path
}
trigger police_path
{
playsound sound/mapa/sirene_police.wav looping volume 600
//play a tank sound
followspline 0 sp_01 100 wait length 304
//this says goto sp_01 at a speed of 100 and don’t look at
//the next command until after waiting 304
followspline 0 sp_02 200 wait length 304
followspline 0 sp_03 300 wait length 304
followspline 0 sp_04 300 wait length 304
followspline 0 sp_05 300 wait length 304
followspline 0 sp_06 300 wait length 304
followspline 0 sp_07 300 wait length 304
followspline 0 sp_08 300 wait length 304
followspline 0 sp_09 300 wait length 304
followspline 0 sp_10 300 wait length 304
followspline 0 sp_11 300 wait length 304
followspline 0 sp_02 300 wait length 304
stopsound sound/mapa/sirene_police.wav
//add more lines for how many more splines u have
//notice that you don’t include scripting for spline controls
}
}

As you can see in this video, it’s not very good, and the model disappears at the end what do you think I need to do? Is it at the script or model level? thank you very much, we are almost there! :slight_smile:

h ttps://youtu.be/6Zv7sRHNP0U


#13

I can answer this - we already do! The forum’s message editor uses the Markdown syntax. Wrap your code segment with three backtics (`) to start and end a code block. You can optionally specify the language immediately after the opening backticks, e.g. (```ruby).

You should get a result a bit like this:

package main

import "fmt"

func main() {
    if 7%2 == 0 {
        fmt.Println("7 is even")
    } else {
        fmt.Println("7 is odd")
    }
}

I hope this is what you were looking for!


(KeMoN) #14

Perfect, that was it! Sorry, I wasn’t aware of the three tics.
Thank you for the quick answer though and please send Moobs my apologies for the wrong ping^^


(Young Fox) #15

Hi guys ! Well, you have to rotate the model directly from Blender
On the other hand, when my car reaches the end point, it changes its axis,

how to keep the car in the right direction? thank you (I tried “setstate police_a default” but without success) thank you in advance!

Blockquote
game_manager
{
spawn
{
wait 50
wm_axis_respawntime 8 // Axis respawn time
wm_allied_respawntime 8 // Allied respawn time
wm_set_round_timelimit 15 // Map timelimit
// Stopwatch mode defending team (0=Axis, 1=Allies)
wm_set_defending_team 0
// Winner on expiration of round timer (0=Axis, 1=Allies)
wm_setwinner 0
}
}
police_a //scriptname of script_mover
{
spawn
{
wait 800
followspline 0 sp_01 50000 length 32 wait //spawn the tank to here
trigger self police_path //goto tank_path
}
trigger police_path
{
playsound sound/mapa/sirene_police.wav looping volume 500
//play a tank sound
followspline 0 sp_01 100 wait length 304
//this says goto sp_01 at a speed of 100 and don’t look at
//the next command until after waiting 304
followspline 0 sp_02 300 wait length 304
followspline 0 sp_03 500 wait length 304
followspline 0 sp_04 500 wait length 304
followspline 0 sp_05 500 wait length 304
followspline 0 sp_06 500 wait length 304
followspline 0 sp_07 500 wait length 304
followspline 0 sp_08 500 wait length 304
followspline 0 sp_09 500 wait length 304
followspline 0 sp_10 500 wait length 304
followspline 0 sp_11 500 wait length 304
followspline 0 sp_12 400 wait length 304
followspline 0 sp_13 300 wait length 304
(setstate police_a default)
stopsound sound/mapa/sirene_police.wav
//add more lines for how many more splines u have
//notice that you don’t include scripting for spline controls
}
}